
.jpg)
How to create proxies from RED files
Shooting with a RED camera is aspirational for most videographers. Miles ahead of Canon, Sony, and Panasonic in terms of frame rate capabilities, RED 8K resolution footage is game-changing for slow motion shots in particular.
But you don’t get superb quality without a little extra work. And when it comes to working with RED footage, that discretionary effort comes in the shape of proxy files.
Proxies are lower fidelity reference files, used within the editing timeline to reduce the hours — if not days — of rending time RED, .r3d raw files would otherwise require.
In the past, working with proxies was something of a minefield. It required expensive software suites, Media Encoders, and arguably just as much time using a proxy saved. Where’s the efficiency in that?
Now, though, it’s quick, easy, and inexpensive to transcode RED files and create proxy files, using the no-code platform, AVflow.
The AVflow platform brings together a host of super-powerful plug-ins and APIs, making the no-code development of video-based applications simpler than ever. More specifically, it can assist in the transcoding of raw video files by triggering actions in simple workflows — RED and RED file proxies included.
So let’s see how it’s done.
Introducing the AVflow workflow
Below, we’ll demonstrate how to use AVflow to transcode a sample .r3d file to Apple ProRes. Mac OS or Adobe tools that can edit ProRes files can then be used to edit videos while maintaining up to 8K high-resolution quality.
Before we get stuck in, make sure you have the following lined-up and ready to use:
- An account on AVflow. Create one here.
- A free AWS account to upload .r3d files in S3 bucket folders before and after transcoding.
- .r3d raw files (you can get sample RED footage here, if needed).
By the end of this AVflow workflow, you’ll have .mov ProRes files ready for editing.
Transcoding .r3d RED footage and create proxies in AVflow
Step 1: Configure a workflow trigger
Log in to the AVflow app, navigate to ‘Flow’ in the left-hand menu, and hit ‘New flow’.
We've gone ahead and named our workflow r3dMediaFlow.
With the workflow creation interface open in front of you, drag and drop the AWS ‘S3 Storage’ bucket API into the center.

This triggers any videos you later upload into the S3 storage folder — specified in the settings fields of the block — to undergo any actions you place next in the flow.
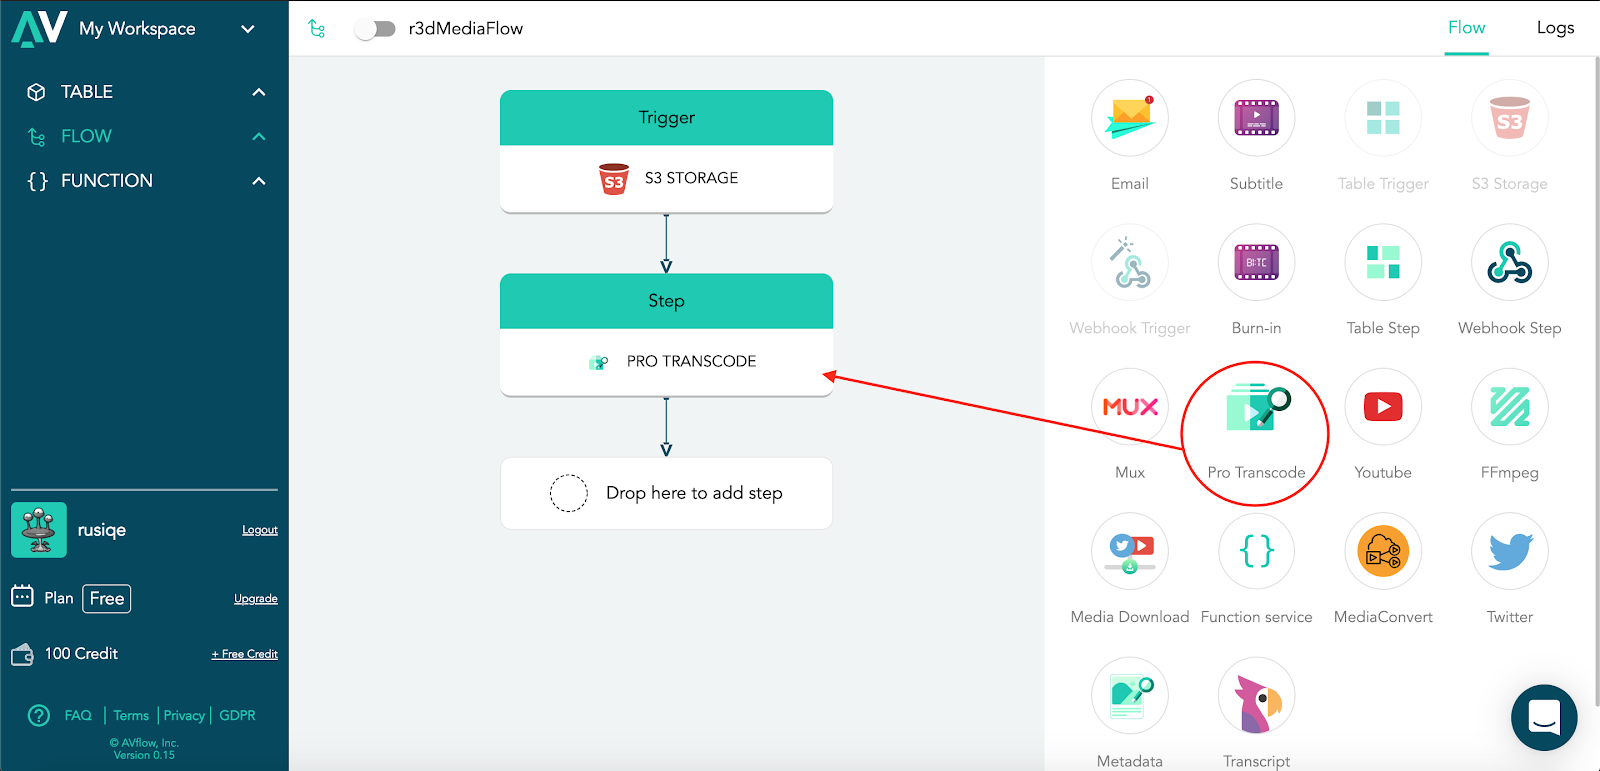
Step 2: Configure the ‘Pro Transcode’ API
In this case, we just want to convert any uploaded .r3d files to the ProRes format. To achieve this, we need the ‘Pro Transcode’ block. So go ahead and drag that icon into your flow.
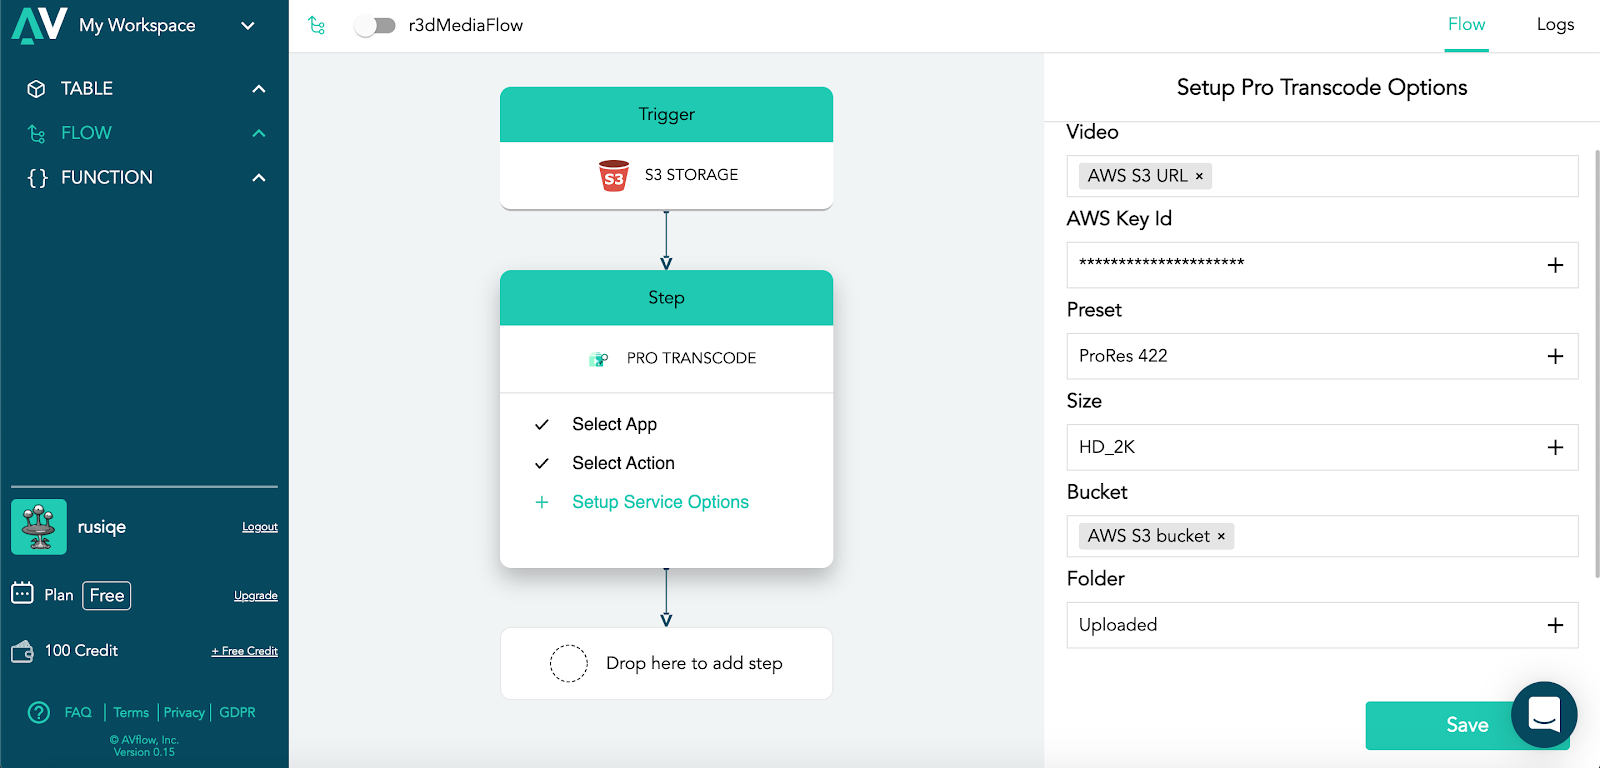
The block will have ‘Transcode video’ as the default action, and what we need to specify is the source folder along with the desired format. For this demo we'll use ProRes 422 as the preset and HD_2K as the output file size, as you’ll see below.
Step 3: Add the "Transfer to Storage" step
You need to save the proxy back to your cloud drive and "Transfer to Storage" lets you do that. Add the step and fill in the details.
Step 4: Go Live!
And that’s it. Now, any RED footage uploaded to your storage bucket will automatically be transcoded to ProRes format, saving you from importing — and then rendering — huge RED footage file sizes.
Depending on how you view your dailies (rushes), you can quickly upload them to a private Youtube Channel by dragging the ‘YouTube’ block into the workflow.
Insider tip > One thing to note while editing your proxies: keep the file metadata consistent with the raw — this makes it possible to reconnect your footage to the higher resolution project when needed.
Trust AVflow for other transcoder and codec workflows too
AVflow’s built in algorithms help make light work of many audio and video editing processes. Check out our other guides to further automate your tasks.