
.jpg)
How to create proxies from ARRI files
ARRI never disappoints when shooting high quality videos. Credited for capturing cinema-grade films, like A Writer's Odyssey, and other big titles recently, it's no wonder the ARRI brand is coveted in the industry.
If you're looking for easy ways to transcode ARRI Original Camera Negatives (OCN) from your ARRI Alexa before editing, transcoding to lower quality proxy files is the way to go. You can always link them back to the raw file quality for grading later.
Better still, using the no-code video processing platform, AVflow, you can create proxies in a matter of minutes — with no extra hardware than a regular laptop.
In this post, we’ll demonstrate how to convert dailies shot on Alexa in ARRIRAW into Apple ProRes using AVflow. This involves changing containers and codecs of each file you upload to a dailies folder.
Transcoding ARRIRAW files to ProRes with AVflow
The AVflow suite boasts a broad range of APIs, essential for audio/video editing and processing. To follow along with this demo guide, you'll need an AVflow account — you can create one here.
When you’re registered, log into AVflow and create a ‘New Flow’. The workflow provides a simple, linear drag-and-drop space to line up APIs that process videos identified by a storage trigger. In our case, we'll use Amazon's S3 Bucket service as a video file storage location.
If you need to, you can download sample ARRI camera footage specific to your gear here.
Step 1: Configure a workflow trigger
After a day of filming, you’ll want to upload your dailies into the cloud for distributed access across your team. Cloud-based storage has always been useful for video editing teams, but now — with the boom in remote working — it’s an essential practice.
Select the ‘S3 Storage’ icon and add it as the first step to your workflow.
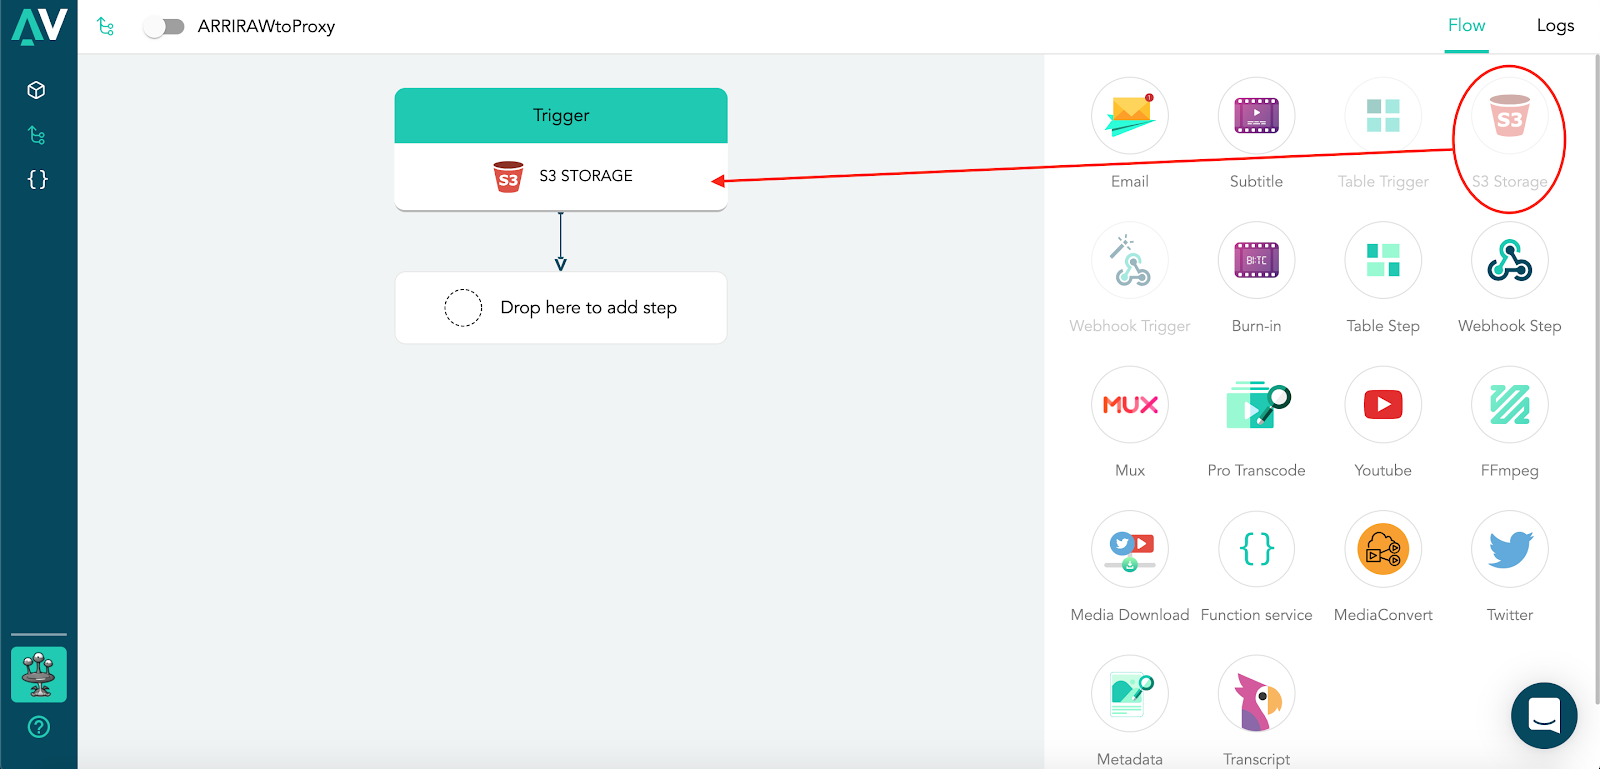
At this point, every new video that lands in the S3 Bucket folder we specify will kick the workflow into action. We’re already making the most of AVflow’s programmatic magic!
Step 2: Configure the ‘Pro Transcode’ API
The next step in your workflow will be to transcode your ARRI video files into a lower-resolution proxy. To do that, we need to drag the ‘Pro Transcode’ icon into the center to open the transcoding block.
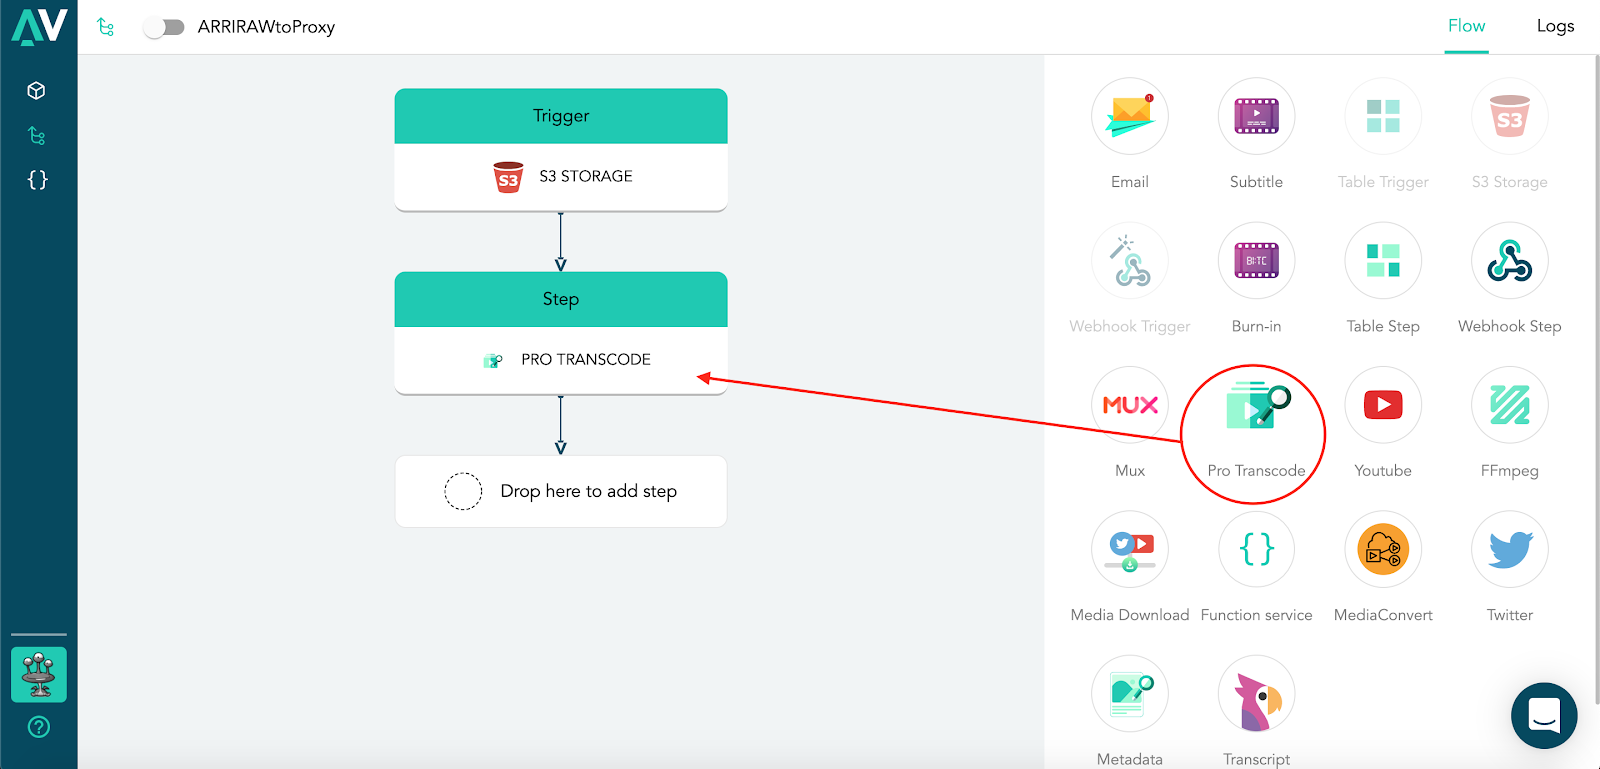
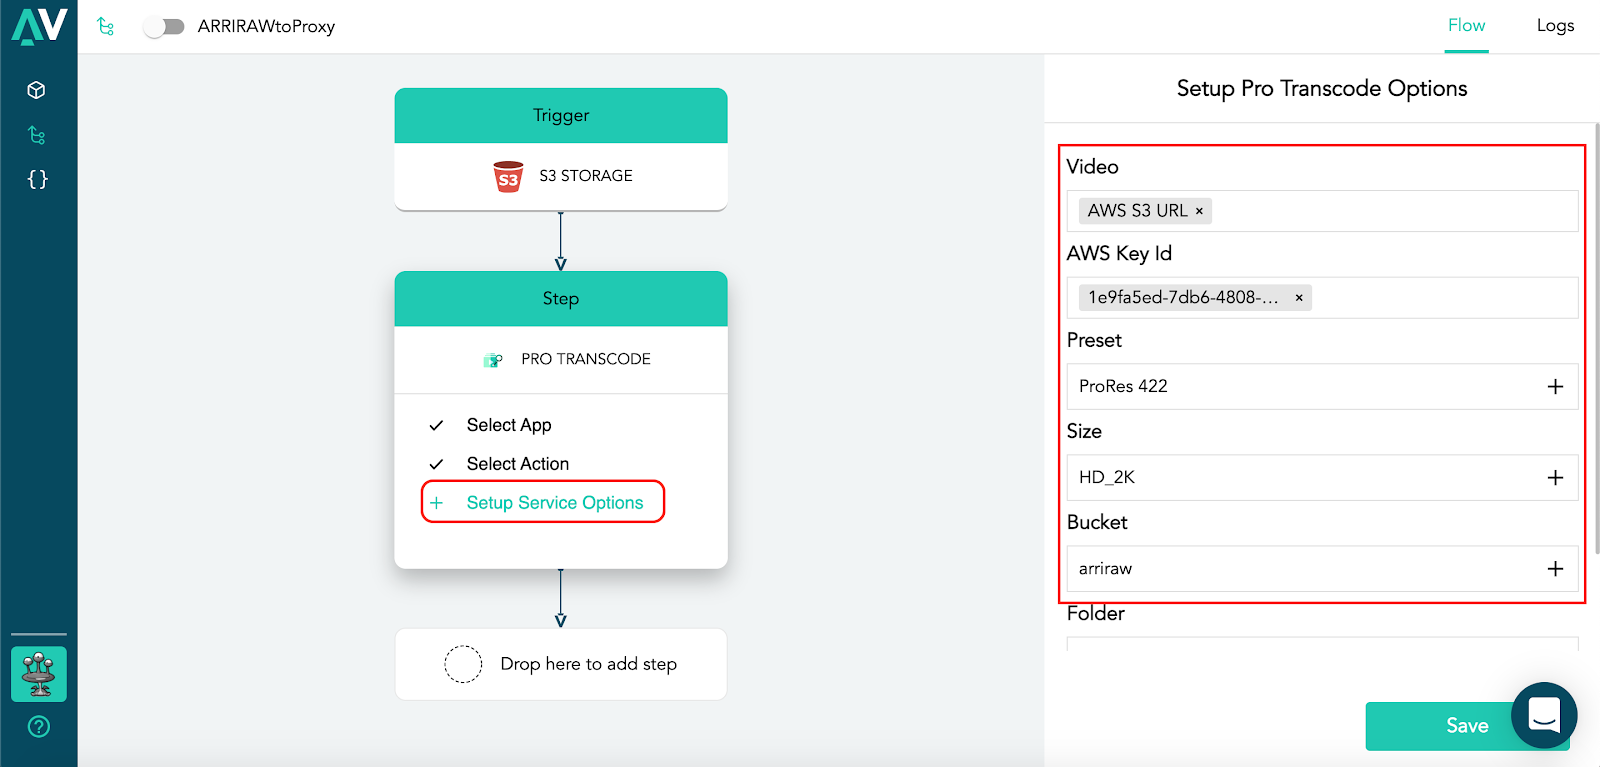
This block determines the quality of your offline proxy. Click on the step to open the settings form, and enter your preferred ‘Preset’ and ‘Size’ variables. For this demo, we'll use ProRes 422 and HD_2k respectively.
Step 3: Add the "Transfer to Storage" step
You need to save the proxy back to your cloud drive and "Transfer to Storage" lets you do that. Add the step and fill in the details.
Step 4: Go Live!
Click the toggle by the Flow name to on. And that's it!
With the workflow on, you’ll have set an automatic transcoder for every video uploaded into a specified S3 Bucket folder. Imagine how quick and easy this 10-minute task will make handling dailies!
Insider tip > One thing to note while editing your proxies: keep the file metadata consistent with the raw. For ARRI files the source timecode and clip name are of particular importance — this makes it possible to reconnect your footage to the higher resolution project when needed.
What else can AVflow help you do?
AVflow helps you put the process of importing, transcoding, manipulating, and saving your video files on autopilot. Now, you can work with the impressive quality and frame rate of ARRI files, without the extra manual labor of preparing the proxies for editing.
Check out what else AVflow can help you do.