
How to programmatically burn-in subtitles on videos
Video subtitles come in two flavors: ones that viewers can turn on and off, and ones that are permanently “burnt in” to the video file itself (known as open subtitles).
Burn-in subtitles are commonly used for videos shared via social media, multilingual films, and for e-learning course content. If you’re building a video-based application that harnesses this kind of content, then burn-in subtitles are well worth your consideration. Or if you’re creating a post production workflow where you want subtitles automatically burned-in to make the editors’ jobs easier, this is the guide for you.
This guide will detail how you can programmatically and automatically burn-in subtitles to all the videos on your platform or in your workflow and to do so efficiently using AVflow.
AVflow is a low/no-code video-based application builder, empowering users to go from idea to market via easy drag-and-drop modules. These modules support programmatically burning in subtitles onto videos each time a new video file is imported or saved to your bucket.
Here’s how you can set this up in 2-minutes.
Step 1: Choose your workflow trigger/source
You have a choice of three different workflow triggers when working with AVflow (we are adding more in the near future):
- An Amazon Simple Storage Service (Amazon S3) bucket (the trigger is a new media file that uploads into it)
- An AVflow Table with file URLs to fetch (you create these in AVflow)
- Or webhooks can also be used to fetch the files from an external location.
These three options are highlighted in the screenshot below.
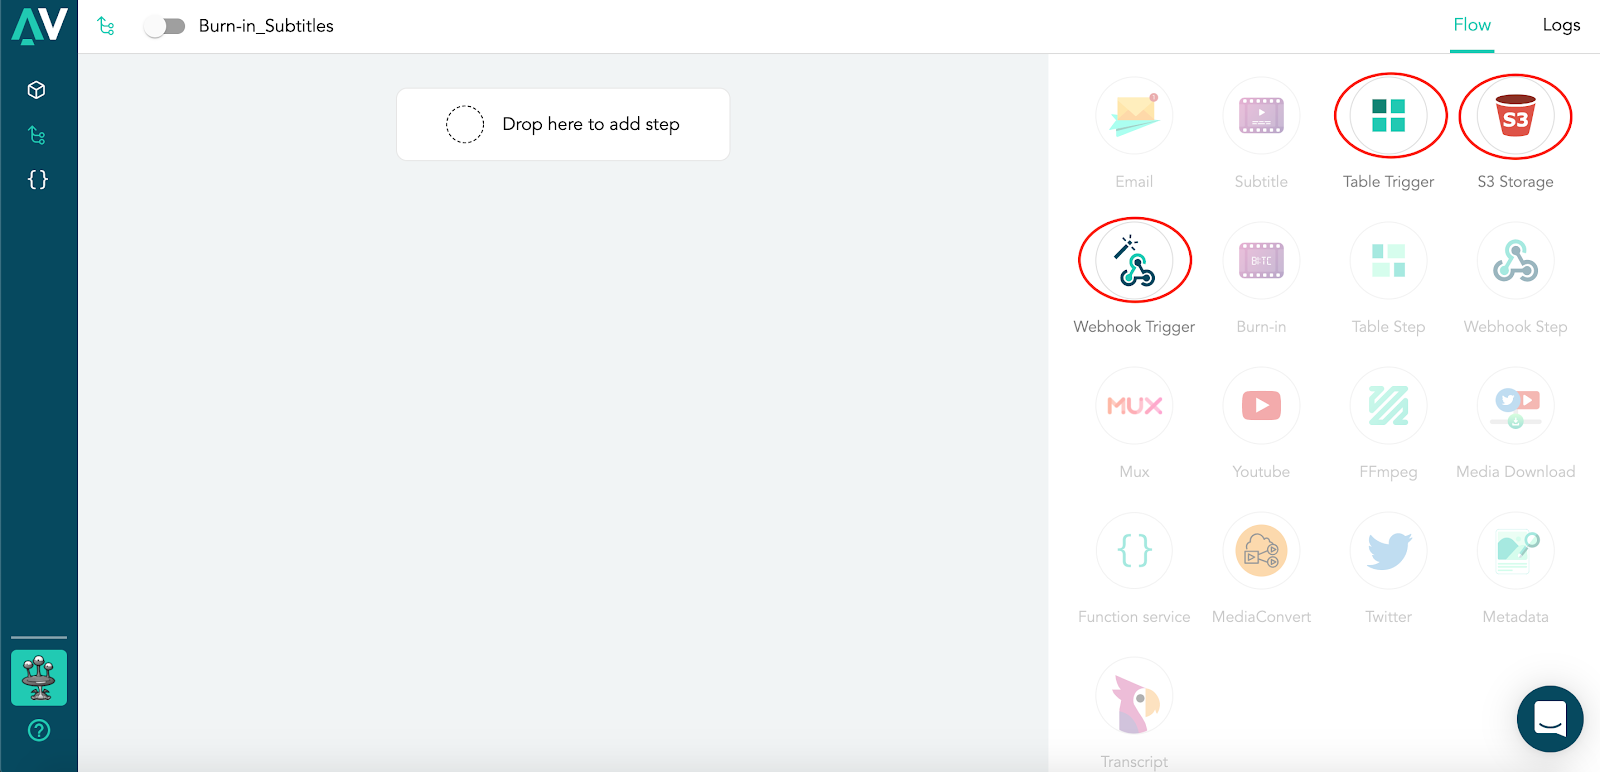
We'll use the Amazon S3 Storage option for the purpose of this demo.
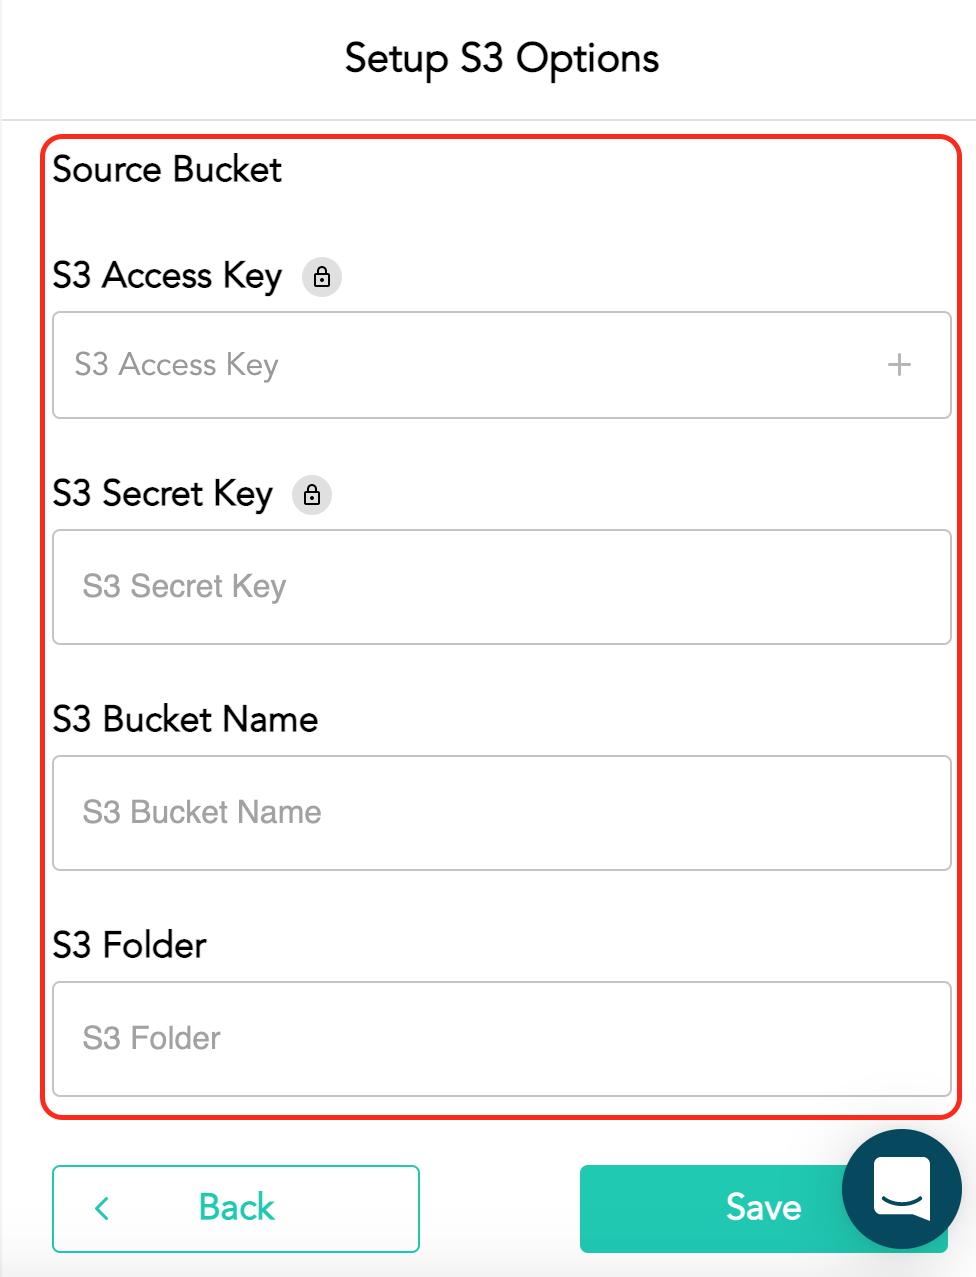
Setting the trigger up is simple. You'll just need to specify your S3 Access Key, S3 Bucket name, and folder name for AVflow to fetch videos from. You’ll need these settings a little later in the process too, so keep them close.
Here’s where the magic starts happening: the workflow you’re building right now will be triggered whenever you add a new video to the S3 storage location (or the storage location of your choice).
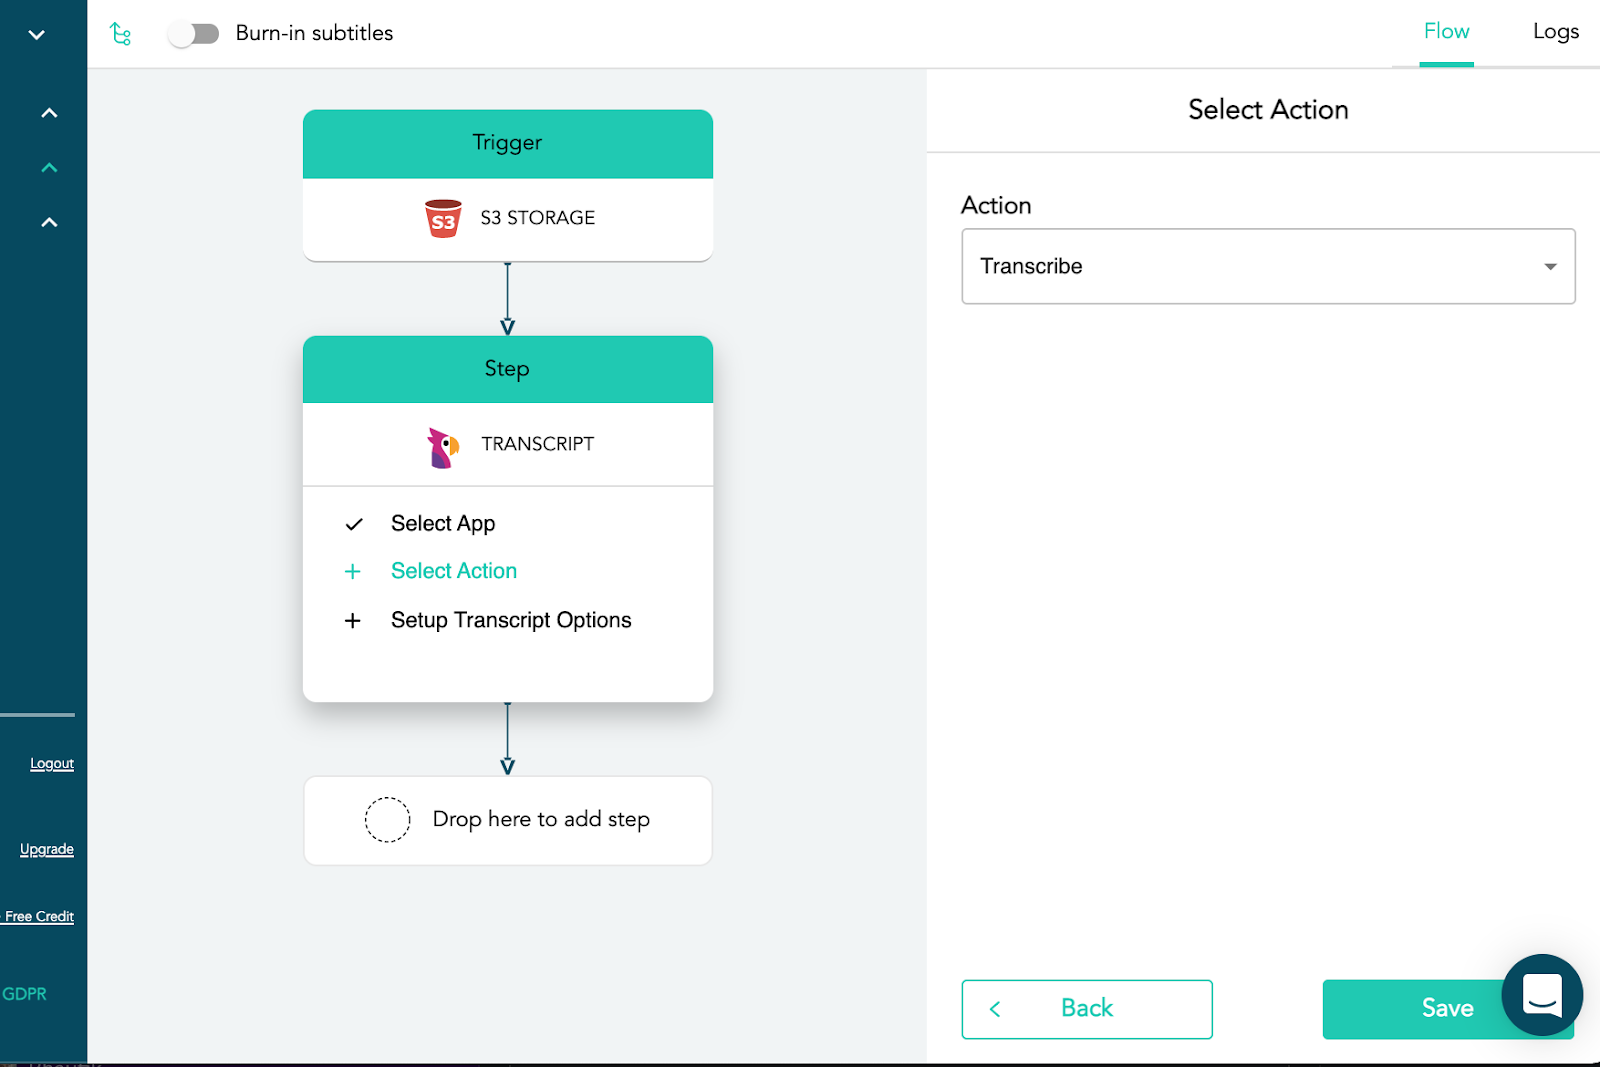
Step 2: Transcribe with ASR
Drop the “Transcript” hook into the workflow so you can apply automatic speech recognition (ASR) AI to the file that was imported to S3 (from Step 1).
Step 3: Turn the JSON to SRT
Next you need to turn the JSON speech recognition output into a subtitle format.
Select the ‘Subtitle’ icon from the menu on the right of your screen and drag it into your workspace. Open the ‘Select Action’ menu and choose ‘Subtitle’ from the drop-down list.

This ‘Subtitle’ step will produce an SRT subtitle file which you can use in the next step.
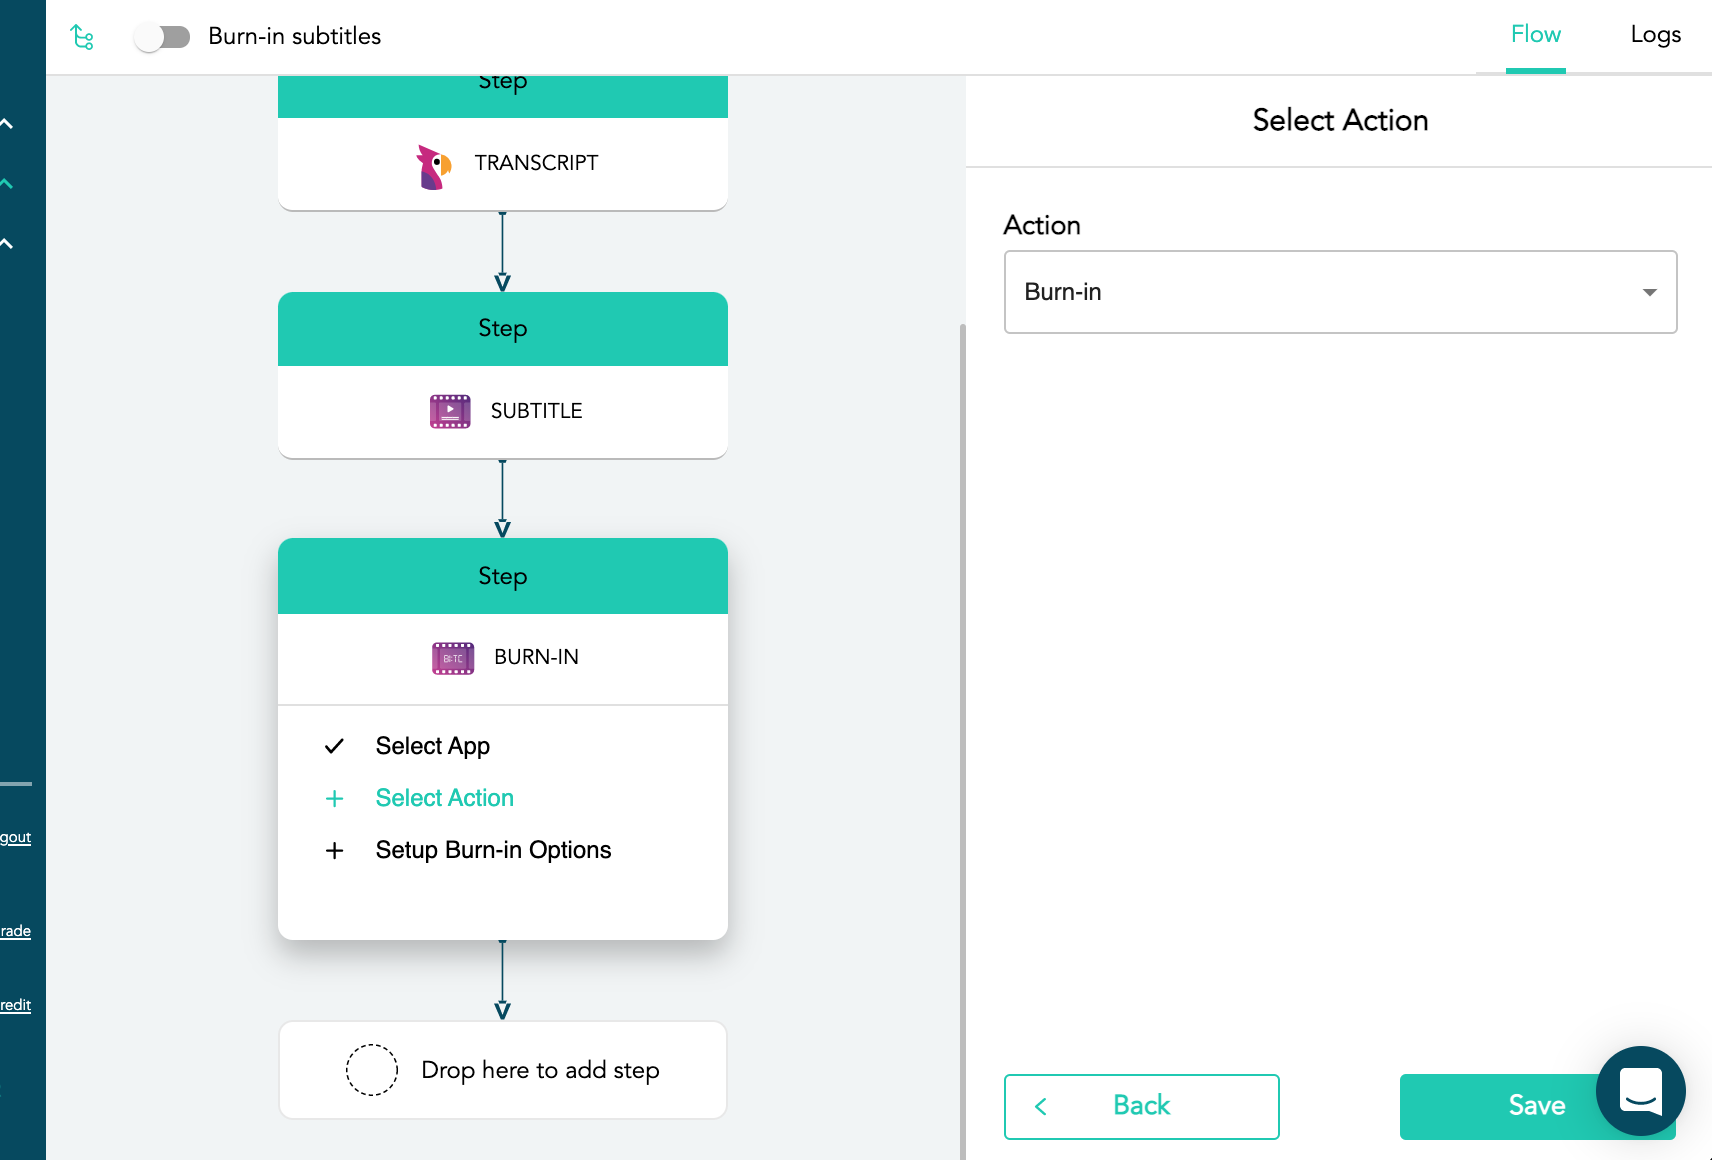
Step 4: Burn the subtitles onto the video file

Drag and drop the ‘Burn In’ icon to your workflow and open ‘Select Action’. Select ‘Burn-in’ from the drop-down et voilà — that’s all there is to do. If you were to check your video file playback now, you’d see that subtitles flowing synchronously with characters and their voices. Your file is saved back in the S3 Storage location you chose during Step 1 and in the folder “Burn In”.
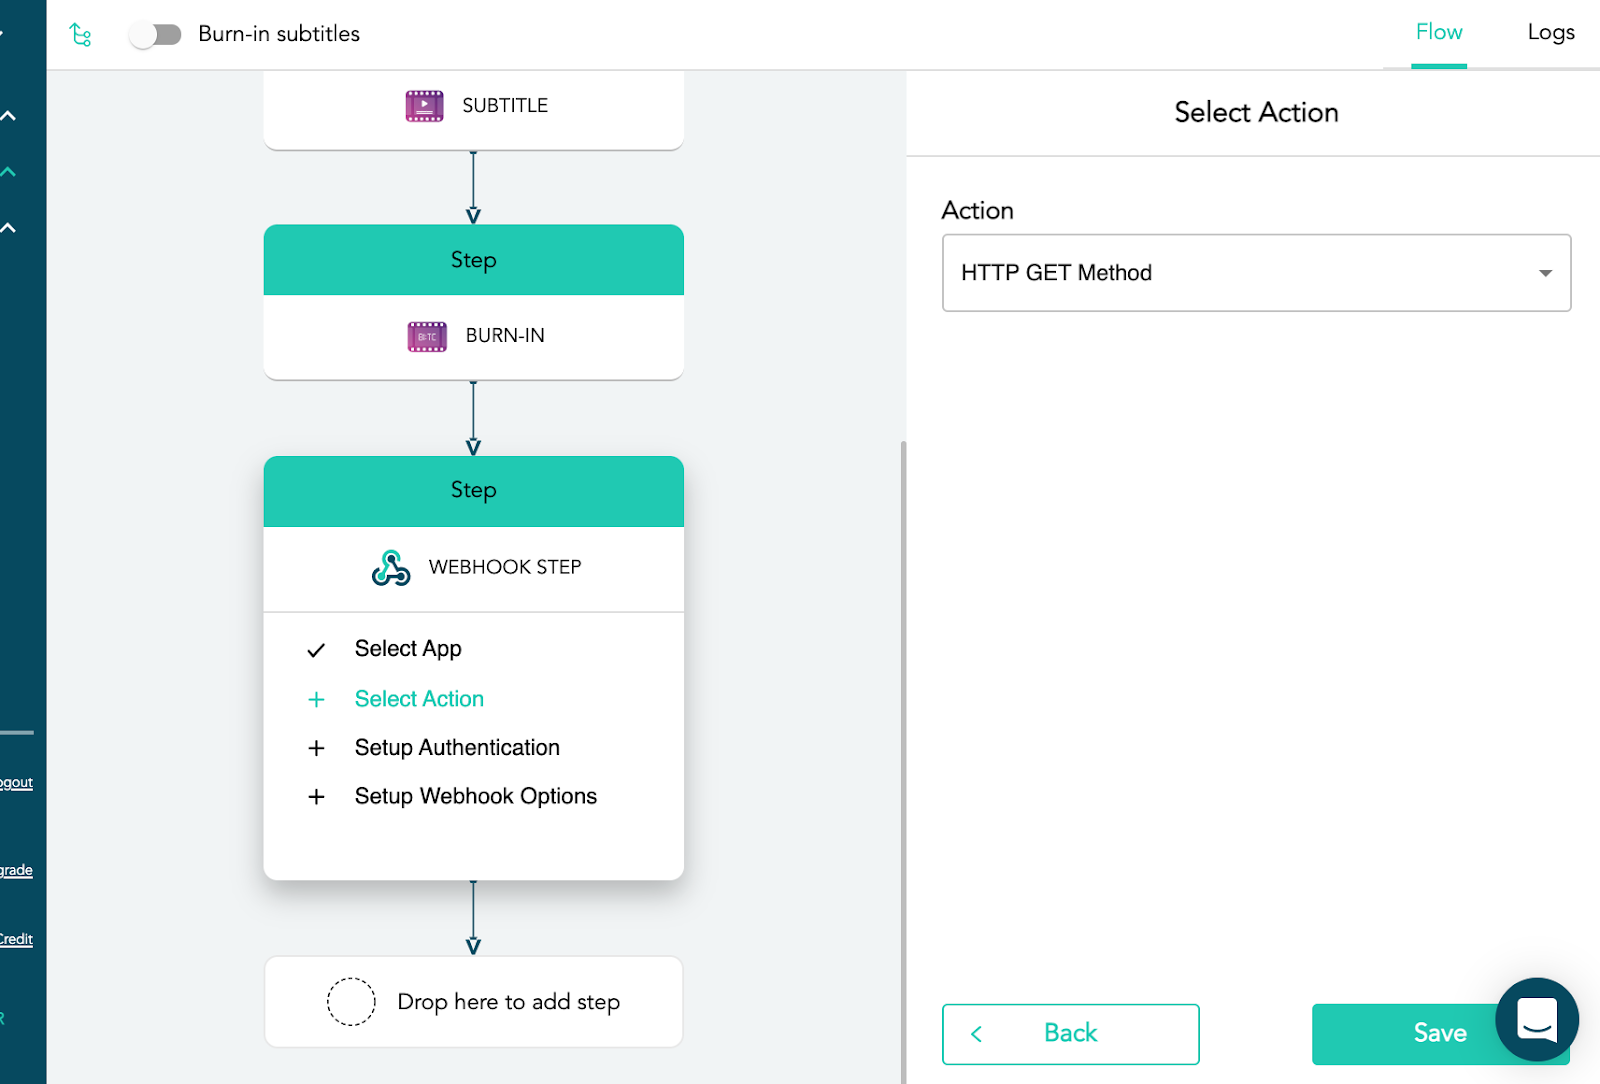
Step 5: Webhook notification back to your application
Drag and drop the ‘Webhook’ icon to your workflow and set it up with the requisite details. This step allows your application/platform to be notified when a burn-in is complete and the URL of the file location.
Automatically create burn-in subtitles/captions for videos published to your platform or in your post production workflow
With your workflow setup, AVflow will automatically create burn-in subtitles/captions from every video that is ingested at the source location which you can then make available on your video platform for consumption or as part of your post production workflow.
It’s easy and scalable. Needs no code or CLI. And allows you to better focus resources on more important tasks.
Experience the power of AVflow for yourself today!